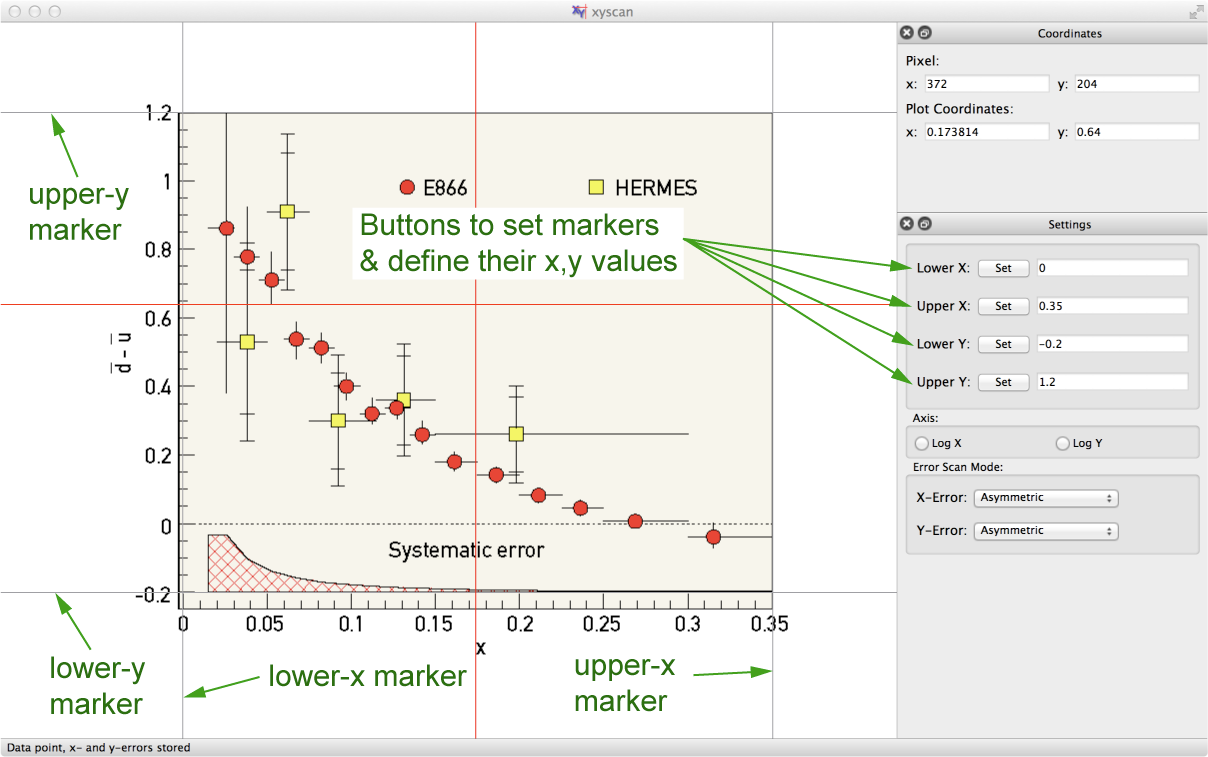
There are 2 markers (gray lines) for the x-axis, x1 (leftmost-x) and x2 (rightmost-x), and 2 markers for the y-axis, y1 (lower-y) and y2 (upper-y).
To place a marker, move the cursor along the x- or y-axis and stop exactly at a point where you can clearly read of the coordinates in the plot (typically a tic mark or the end of the axis). For the x-marker it doesn't matter where you are in y, for the y-marker the x position is not relevant. After you positioned the cursor press the Set button of the referring marker in the Settings window (see Component Overview) or alternatively use a shortcut key (see below). An input dialog pops up where you can enter position of the marker in plot coordinates. For the example depicted in the figure above x1 = 0, x2 = 0.35, y1 = 0, and y2 = 1.2. You can place the markers in any order. Once a marker is set, the coordinate you assigned is displayed in the Settings window. If you think a marker is not properly placed you can set it again at any time. Once the first marker is set the rotation angle of the plot or the scale (see Rotating and Scaling Plots) cannot be changed anymore.
Once all 4 markers are set, xyscan will start to display the plot coordinates of the current cursor position in the Coordinates window (see Component Overview).
Hint: the further away x1 and x2 (y1 and y1) are from each other the higher the precision of the scan.
Shortcut keys are:
Ctrl+1
(Mac OS: Command+1): set lower x marker
Ctrl+2
(Mac OS: Command+2): set upper x marker
Ctrl+3
(Mac OS: Command+3): set lower y marker
Ctrl+4
(Mac OS: Command+4): set upper y marker